
by Ward Stevens
Curious about tangential segmented turning? Here are some step by step photo's of how I built the forms for the recent President's Challenge (to make something from a wine rack kit). If you are a member of the AAW you can find Robert Craig's article describing, in detail, this type of turning by clicking here. Just one of the benefits of becoming a member, you can get a print or electronic copy of American Woodturner each month, as well as access to previous issues, all on-line. They are full of information and great ideas.

First a word about tangential versus radial segmented turning. When you read Robert Craig's article you will see his drawing showing the difference between the two. Radial segmented turning requires the maker to cut very precise angles so the segments won't have gaps. Tangential segments, provided you have enough of them, can be snugly arranged on any straight round form regardless of the angle chosen.

From American Woodturner August 2014, p. 24
The big challenge for this project was creating the wedges to make up the "tangential" segments. To do this safely, I built a sled to rip a hypotenuse after trimming off one of the sides of the octagonal rod from the kit. Here are few annotated photos of the sled (try clicking on the images to enlarge them). It's like a traditional cross-cutting sled, a sheet of plywood (or particle board in this case) that has runners underneath and fence/stiffeners that bridge the kerf. Since I ripped the wedge under the tilted blade, I hot-melt glued the piece to a side block to prevent the piece from rattling around under the spinning blade. You might want to rethink the design of your sled- I'm sure there are improvements to be made. The main objective for me was a jig that allowed me to keep my fingers well away from the blade.


After cutting the triangular cross-sections, I glued three pieces of veneer (mahogany-maple-mahogany) onto the hypotenuse face using spring clamps. By using a second wedge, I was able to clamp the stack parallel to the lay-up board. (these pictures will enlarge if you click on them)


Rather than make an adjustable mandrel for laying up the segments as suggested in the article, I turned a truncated cone. For glue-up, I used Titebond III® (which has a long working time), a piece of plastic wrap over the cone, and two hose clamps. After the assembly cured overnight, I was able to tap out the mandrel, remove the plastic, and then reuse the mandrel (the centers are already there!) to square up the top and bottom of the form and clean up the outside.
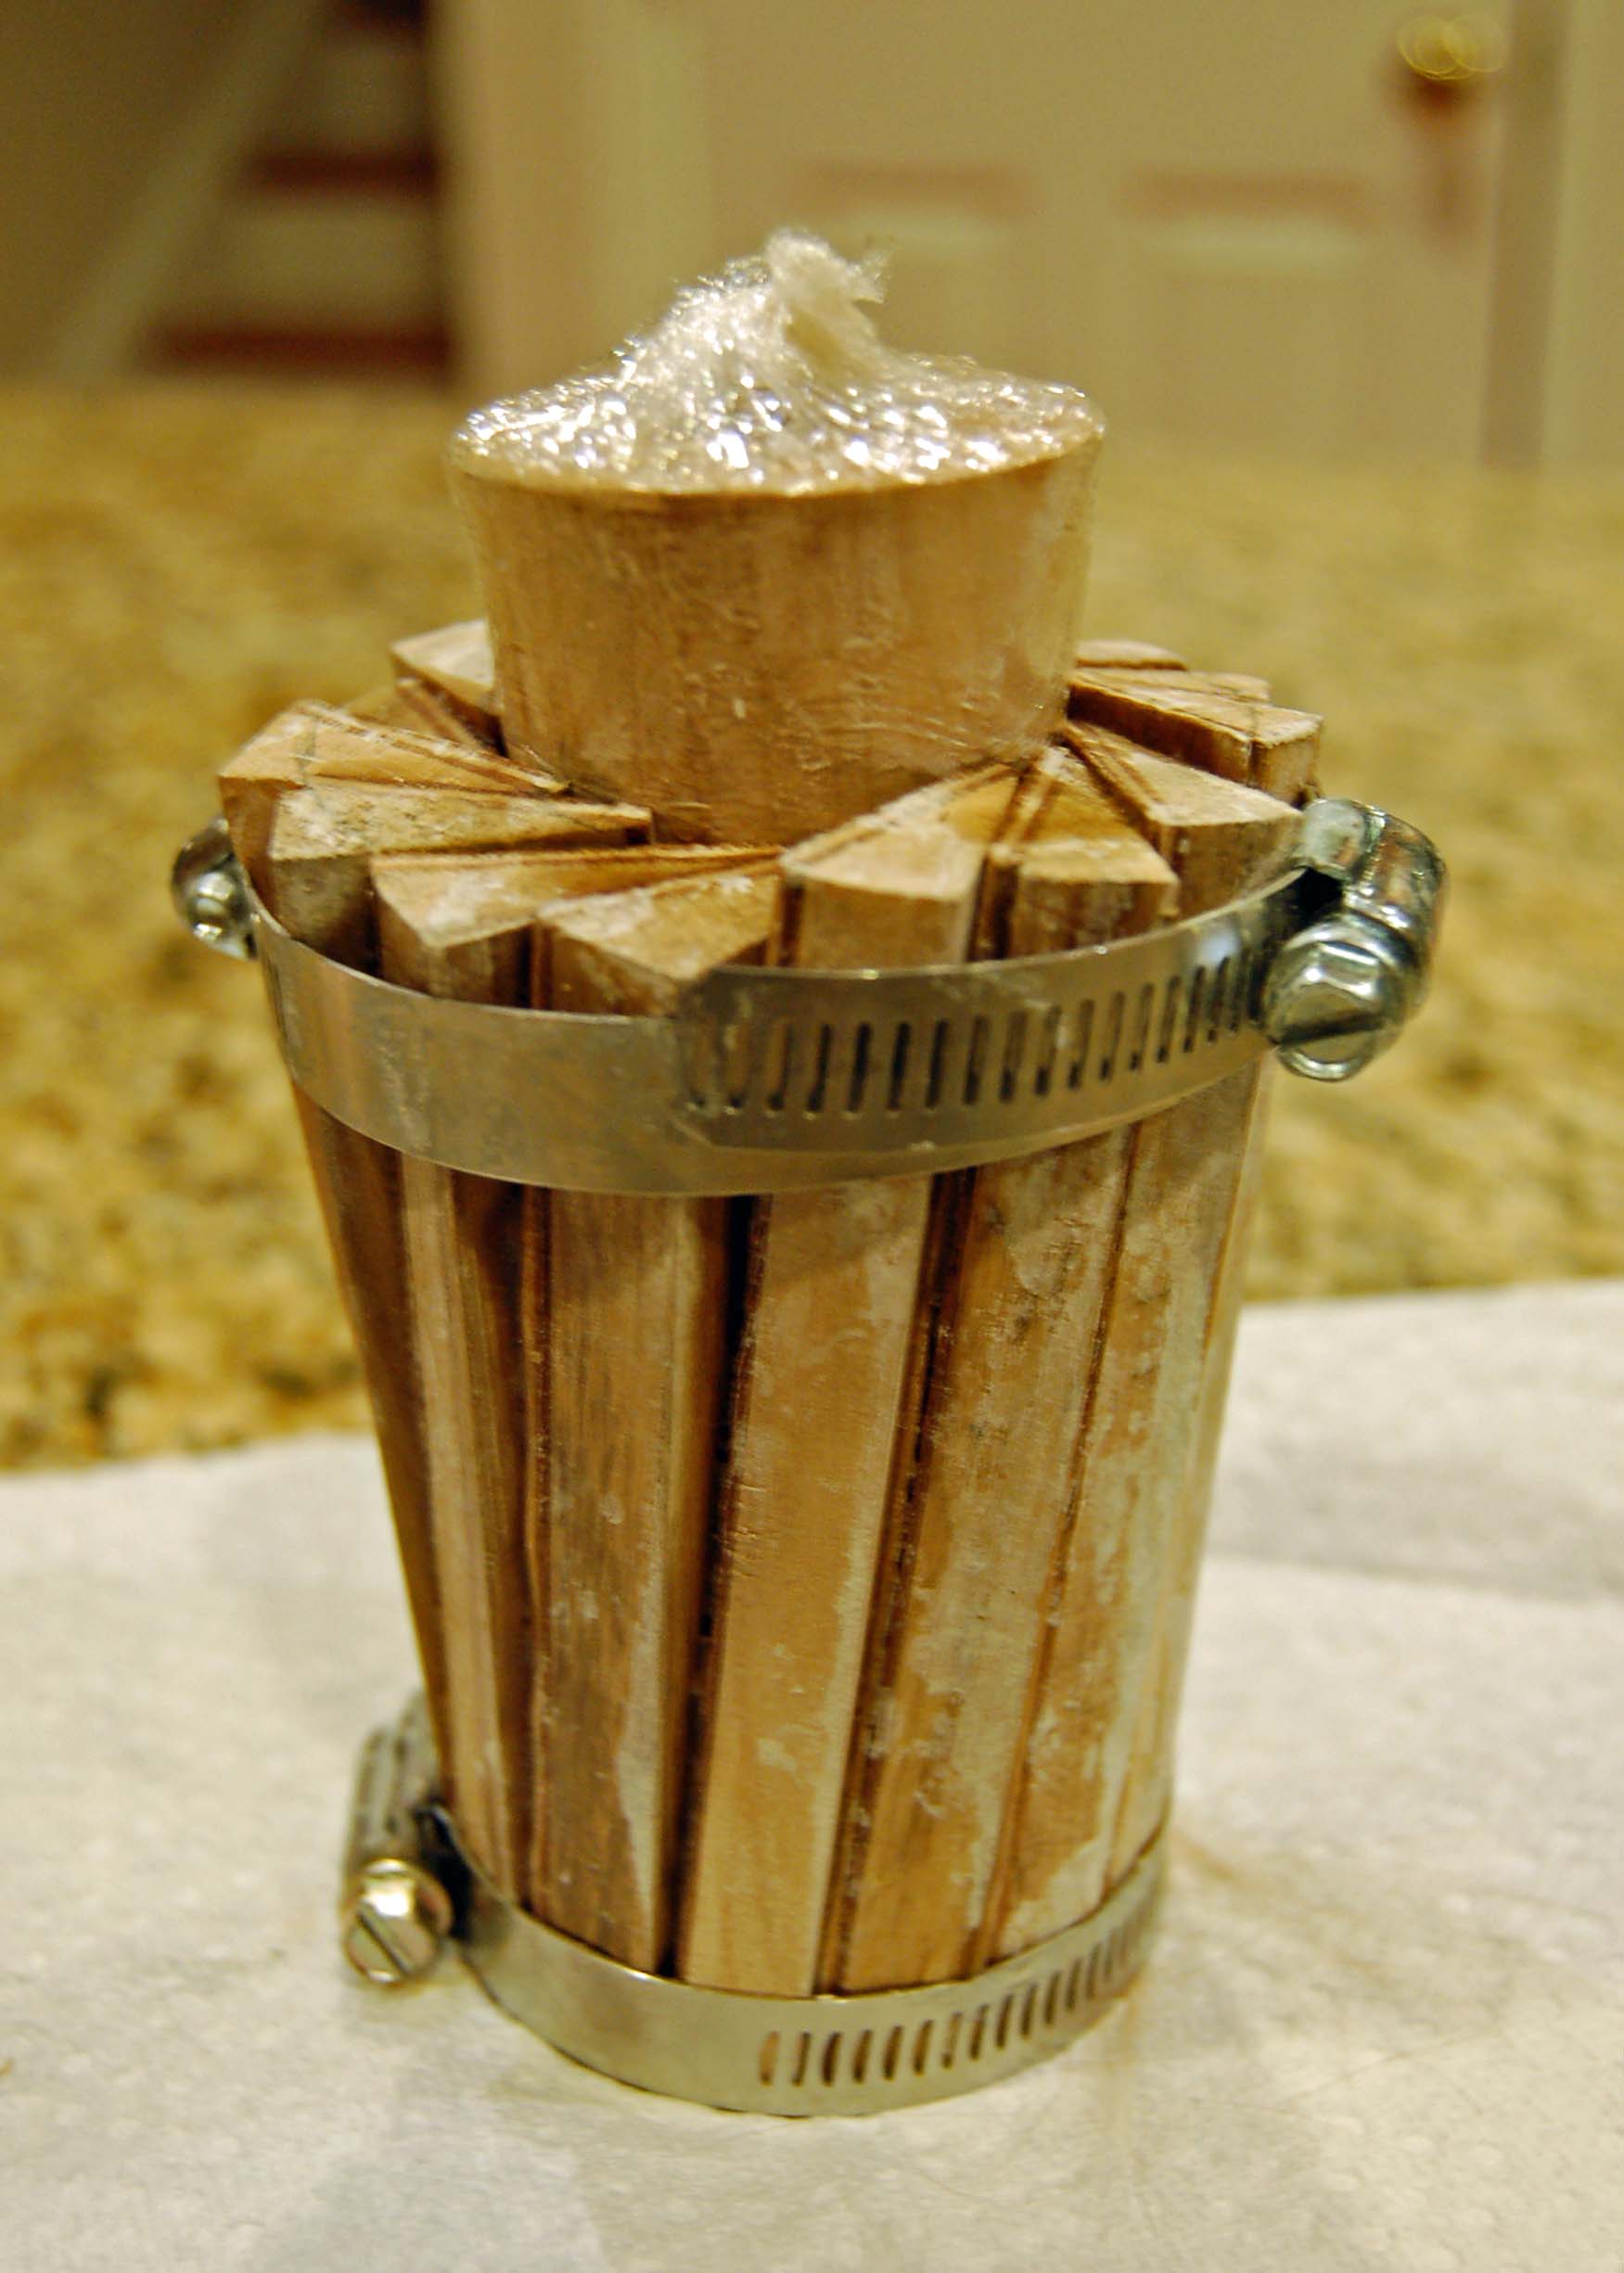
Because I wanted to make a vessel I needed to plug the bottom. A Forstner bit made it easy to create a straight-walled mortise. I then turned a chunky piece of mahogany, orienting the long grain in the same direction as the rest of the piece, to make the tenon and foot. (If you don't have a second lathe, this project could be your justification for that big lathe or mini lathe so you don't have to take the conical form off to make the foot- just a suggestion.)


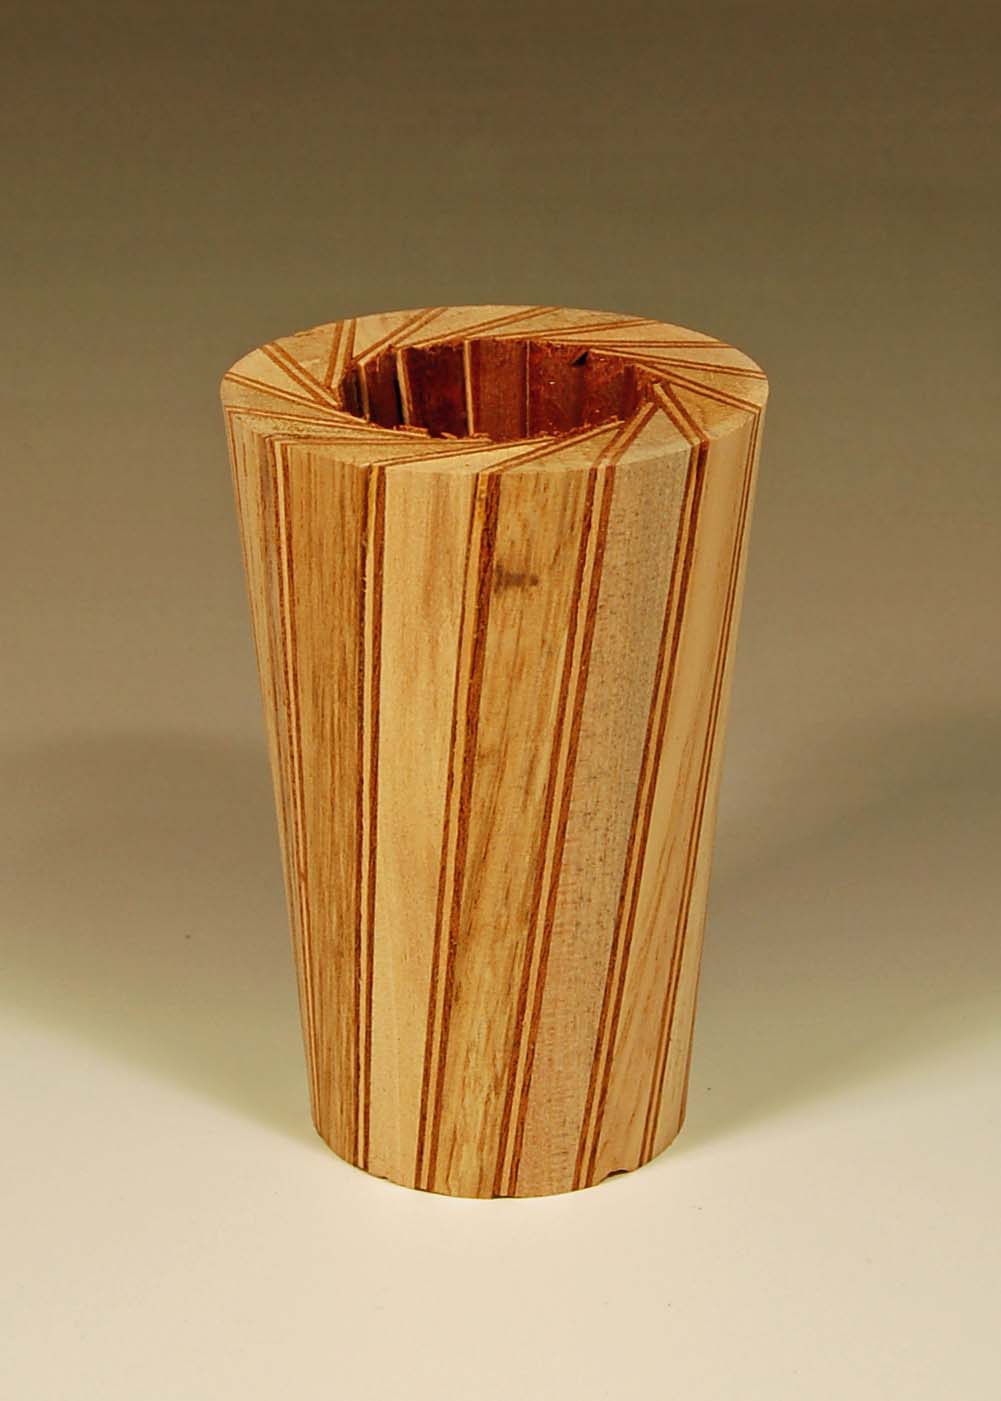
With the foot made, you are ready to turn any shape you'd like from this basic shape. The form show below was used to make the tall vessel shown above. The two smaller vessels were made in a similar fashion, one with a conical mandrel, the other with a straight cylinder. If you want to see some really nice turnings, check out Robert Craig's article! Feel free to contact me if you have any questions.
